For writing and execute C program we require two things, these are editor and compiler. The text editor is where you write your programs and compiler translate your text code into a binary stream( 1s and 0s) which computer understands.
There are four steps attached with C program these are coding, compiling, running and debugging (It require when bugs occur). There are many IDE (Integrated Development Environment ) available but here I will describe the Dev-C++ because personally, I feel that Dev-C++ is very userfriendly and anybody can install and use it.
Steps to installing Dev-C++ in Windows:
Download the setup:
If you don’t have the setup of Dev-C++, then before installing it, you should download the setup of Dev-C++. The good thing is that it is totally free and you don’t need to pay anything (Dev-C++ is Free Software distributed under the GNU General Public License). You can download it from below given link.
Install the setup:
After downloading the setup double click on it, it extracts the package from the setup and asks to select the language. So select the language as per your choice and press the ok button.

Accept the license agreement.

In the next prompt window, it will ask you to select the package you want to install. Here you don’t need to anything just press the Next button.

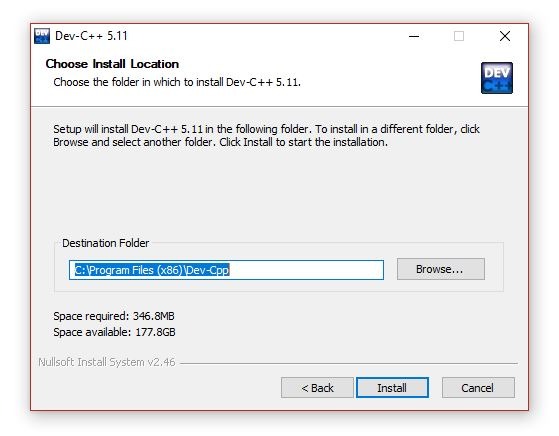
Select the destination folder (keep it to default) and press the install button. It will take a few minutes.


After completing the installation, Dev-C++ will prompt a window with a finish button. Just press the finish button.

After pressing the finish button it asks for language and fonts. If you want to change the language and fonts, then you can change.


